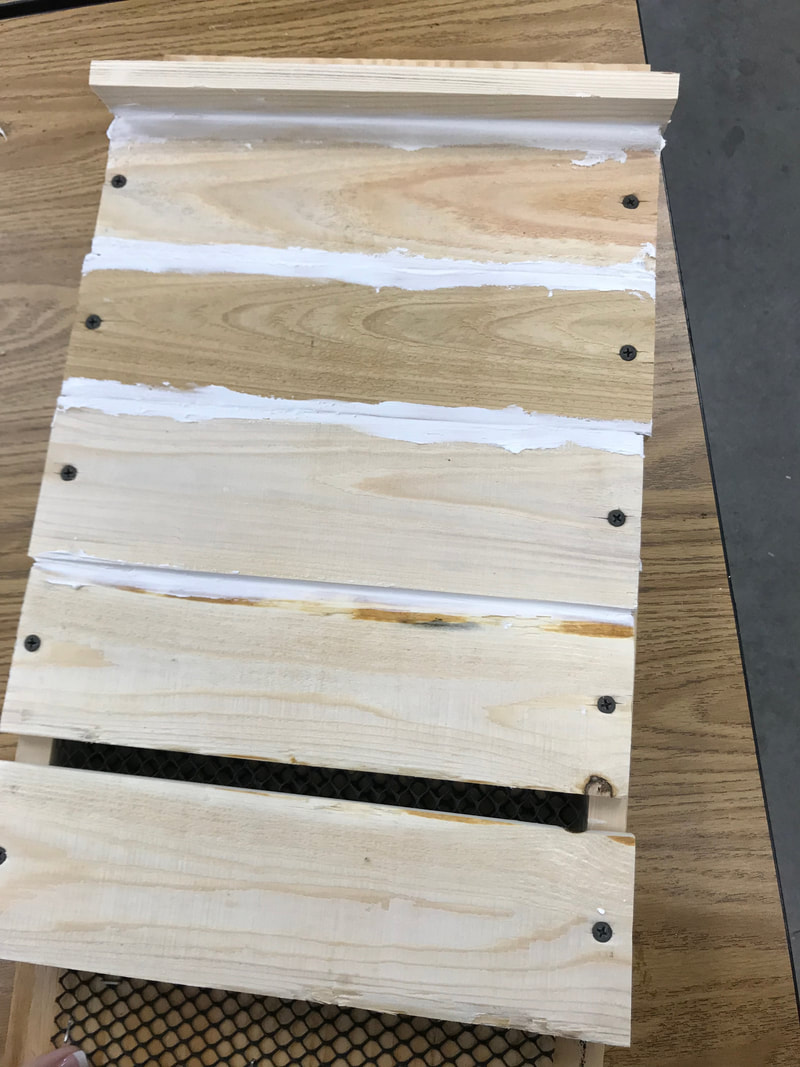
Measure and draw lines on your wood of where each cut needs to go. You can use the same piece of wood if there is enough room. Once you draw the lines, double check to make sure each measurement is correct.
Cutting the Wood
We started by cutting the front, back and top pieces of the board. We used a radial arm saw to do this.
Our next step was to cut the side pieces of the house. Those pieces should be cut normally using a radial arm saw, but then you will need to make 10 degree angle cuts. Use a miter saw to cut those angles.
You will also need to take one of your 3.5 by 12" pieces and make a 10 degree cut across the side (picture below).
Click on pictures to view full image.
Sanding the Wood
Once all cuts are made, the next step is to sand down each piece. Start by using the belt sander to sand down the sides of the wood.
The next step is to use a hand sander to sand down the top and bottom of the wood.
Construction: Drawing Pilot Holes
The first step is to measure 2 3/4" up from one side of the board. This will be where your side pieces start.
The next step is to draw your pilot holes.
Line your two side pieces with your back pieces. You will want three pilot holes on each side.
Once you know where you want your pilot holes, match it up will your back piece. Draw your holes on the back piece where the ones on the side will be. This is where the pilot holes will go through.
You will not make any pilot holes in the side pieces.
Pilot holes not drawn to scale.
The next step is to line up all your pieces on your board. When lining your pieces up, your last front piece will have a small space between it and the other pieces (refer to picture below). Line up that last piece with the edge of the side piece; that will be how big your space will be. This will help you see where your pilot holes will go for the front pieces. Draw one pilot hole in the middle of each piece on both sides.
The next step is to draw pilot holes for the top piece of the bat house. Keep your pieces lined up for when you drew your front pieces. Place the top piece on the angled side of the wood. Draw two pilot holes on top where it meets the side pieces.
Construction: Drilling Pilot Holes
The next step in your process is to actually drill your pilot holes where your drawn marks where placed.
Only drill through the holes you made on each individual piece.
Do not drill any pilot holes through your two side pieces.
Putting on the Mesh
During this step, you will drill three pieces together to add in mesh. This plastic mesh is needed because the bats will then have something to climb/cling to.
What you want to do first is take your back piece and your two side pieces. Place them with the side pieces on the table and the back on top. Make sure to line up your side pieces with the line you made 2 3/4" up. The long side of the side piece should be even with the line. When lining up, your side pieces should be on the edge of the back piece but not hanging out.
Once your pieces are completely even, drill your screws through the pilot holes. There should end up being three on each side.
Click on pictures to view full image.
Your next step is to flip over your board and lay it face down. This is where we will be putting on the mesh.
You want to get our your mesh and measure around 10 1/4". The sizes may vary and can be cut to size as needed.
Click on pictures to view full image.
We started by placing the mesh where our line was to mark 2 3/4" from the edge.
From there we lined up each piece and placed the mesh the entire way to the end.
As you line up each piece, use a stapler gun and staple in all four corners and in the middle. Do this on each piece.
Click on pictures to view full image.
Once you have all the mesh put against your back piece of your bat house, take out all of your front pieces.
Line up your front pieces on top of your side pieces. Start lining your pieces on the angled side of your side pieces. Your last piece should be placed on the very edge of the side pieces; leaving a small space between it and the rest of the boards (refer to pictures below).
You will be doing the same thing with the mesh as you did for your back piece. Line it up with your pieces and staple it to the wood.
Once your mesh if stapled to your front pieces, carefully flip them over and place them back onto your side pieces.
Putting on the Caulk
Your next step is to use Silicone Caulk to cover all the cracks.
Start by taking your front pieces and putting caulk in the long, narrow side of each board. The caulk should go in between each piece so that you can stick them together (refer to picture below).
Once all your front pieces are finished, let it dry. We will move onto drilling in the nails but come back to this in a later step.
Click on images to view full picture.
Construction: Drilling in Nails
At this point, you should have your two side pieces drilled to your back piece with mesh on it. You should also have mesh and caulk on every front piece.
The next step is to drill all of your front pieces to your board. Put your topic piece against your lined up front pieces and make it even. Then drill in each of your screws.
As you drill, start with all four corners and work your way to the rest of the board.
Your last step is to drill in your top piece. It should already be lined up with your board so just drill through your pilot holes.
Putting on the Caulk-Part 2
Once all of your pieces are drilled together, we can finished putting on the caulk.
For all the parts below, use your finger to smooth the caulk on the wood.
You want to place caulk along the top where that pieces meets the back board (refer to first picture below).
You then want to go along both sides on put caulk on any seam with the side, back and front pieces (refer to middle pictures below).
The final step is the put caulk on the front pieces so there is no seam on the front of the bat house (refer to last picture below).
Click on pictures to view full image.
Sanding the Bat House-Part 2
Once the caulk has completely dried on your bat house, we need to sand again.
Take a hand sander and go over the front and sides of the bat house.
Use normal sand paper to sand the crease between the back and top pieces.
Painting/Staining
The last step in this process is to paint or stain your bat house. We would recommend a darker stain color because the caulk will not show through as much as it would with lighter stain.